Running your own full node for Bitcoin or Litecoin is one of the most empowering steps you can take as a user. It ensures you’re verifying the blockchain independently, improves your privacy, and contributes to the resilience of the network.
In this post, we’ll walk through setting up a Bitcoin or Litecoin node on a Hetzner ARM64 VPS running Linux, and cover important concepts like txindex, RPC, and pruning.
Why Run Your Own Node?
- Trustless verification: Don’t trust, verify. Your node validates all blocks and transactions.
- Privacy: You don’t leak your IP or wallet data to public explorers.
- No rate limits: Public APIs often throttle requests; your own node gives unrestricted blockchain access.
Choosing a Server
For this setup, I’m using Hetzner’s ARM-based Cloud VPS (CAX series) — specifically, the CAX21 model (4 vCPUs, 8GB RAM, and 80GB NVMe SSD). These servers strike a great balance between price, performance, and energy efficiency, especially for lightweight full node deployments.
⚠️ WARNING: Running full nodes for Bitcoin and Litecoin in 2025 requires significant storage: approximately 850 GB for Bitcoin and 91 GB for Litecoin. Allocating at least 1 TB and 100 GB respectively is recommended to accommodate future growth. For those with limited storage, pruned modes offer a viable alternative, reducing requirements to just a few GBs while still maintaining full validation capabilities.
Installing the Node Software
We’ll use the official Core binaries for either Bitcoin or Litecoin. Both projects provide builds for ARM64, which run perfectly on Hetzner’s CAX servers.
Firstly to improve security, we avoid running the node as root.
sudo adduser litecoin                     # sudo adduser bitcoin
sudo usermod -aG sudo litecoin           # sudo usermod -aG sudo bitcoin
su - litecoin                            # su - bitcoin
Visit the official websites to download the latest release for your architecture:
- Bitcoin Core: https://bitcoincore.org/en/download/
- Litecoin Core: https://litecoin.org/
To download and extract the Litecoin binaries, run the following commands in your terminal:
mkdir -p ~/litecoin-node && cd ~/litecoin-node             # mkdir -p ~/bitcoin-node && cd ~/bitcoin-node
wget https://download.litecoin.org/...                     # wget https://bitcoincore.org/...
tar -xvf litecoin-<version>-aarch64-linux-gnu.tar.gz        # tar -xvf bitcoin-<version>-aarch64-linux-gnu.tar.gz
cd litecoin-0.21.4/bin                                     # cd bitcoin-26.0/bin
Configuring Your Node
Before running your Litecoin or Bitcoin node, you need to set up a directory where the blockchain data and configuration files will be stored, and create the initial config file:
mkdir ~/.litecoin                                          # mkdir ~/.bitcoin
chmod 700 ~/.litecoin                                      # chmod 700 ~/.bitcoin
nano ~/.litecoin/litecoin.conf                             # nano ~/.bitcoin/bitcoin.conf
To set up your litecoin.conf file, you don’t need to write it all by hand. There’s a web tool — the Bitcoin Core Config Generator — that makes it easy to pick your settings and generates the config file for you.
Even though it’s made for Bitcoin, it works for Litecoin too, since Litecoin is based on Bitcoin Core. Just make a sure to change any default port numbers if needed (Litecoin uses port 9332 for RPC, not 8332).
Here’s a minimal pruned-node config that works well for most setups:
server=1                      # Enable RPC
prune=550                     # Enable pruning (For Full Node don't include)
txindex=0                     # Disable transaction index (Prune mode doesn't work with txindex)

rpcbind=127.0.0.1             # Bind RPC server to localhost
rpcallowip=127.0.0.1          # Allow local RPC access only (Can also be set to a range of ips)

rpcauth=myrpcuser:0aa9f46e9c8...$f6c1839c6e8...  # Secure RPC auth line (Generated password with rpcauth.py, hashes the password)
To generate an RPC auth password, you have to use the rpcauth.py script provided by Bitcoin Core, which creates a secure hashed authentication string for your configuration file.
Litecoin doesn’t include the script by default in binaries, but you can use the Bitcoin Core version:
wget https://raw.githubusercontent.com/bitcoin/bitcoin/master/share/rpcauth/rpcauth.py
python3 rpcauth.py yourusername
Running the script will return the credentials for your rpcauth key. Replace it with the example value in your config file.
Run Node as a Service
To ensure your node starts on boot and stays running, set it up as a systemd service.
Create a Service File for your Node:
sudo nano /etc/systemd/system/litecoind.service # sudo nano /etc/systemd/system/bitcoind.service[Unit]
Description=Litecoin daemon
After=network.target
[Service]
ExecStart=/home/litecoin/litecoin-node/litecoin-<version>/bin/litecoind -conf=/home/litecoin/.litecoin/litecoin.conf -datadir=/home/litecoin/.litecoin
User=litecoin
Group=litecoin
Type=simple
Restart=always
TimeoutStopSec=60s
TimeoutStartSec=10s
[Install]
WantedBy=multi-user.targetMake sure you replace the <version> value with the correct version otherwise you’ll get an error running the node.
Make sure the node can access the Configuration File:
sudo chown -R litecoin:litecoin /home/litecoin/.litecoin # sudo chown -R bitcoin:bitcoin /home/bitcoin/.bitcoinIf you’re running a Bitcoin node instead, just replace all instances of litecoin with bitcoin, and litecoind with bitcoind.
Reload systemd and enable the service, make sure you read “Make Syncing Faster” section before you start the node:
sudo systemctl daemon-reexec
sudo systemctl daemon-reload
sudo systemctl enable litecoind                               # sudo systemctl enable bitcoind
sudo systemctl start litecoind                                # sudo systemctl start bitcoind
sudo systemctl status litecoind                               # sudo systemctl status bitcoind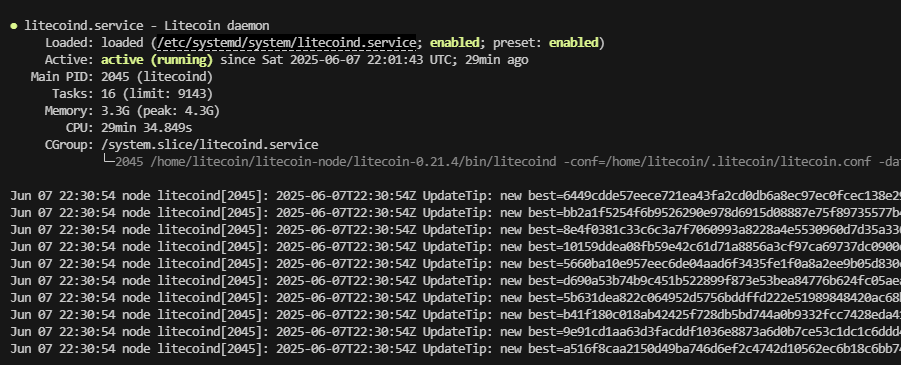
To check logs and confirm it’s running:
journalctl -u litecoind -f # journalctl -u bitcoind -fConfigure Firewall
If you’re running your node on a Hetzner Cloud VPS, it’s important to configure both the Hetzner Cloud firewall (via the web panel) and the local firewall (UFW) on the server itself.
In the Hetzner Cloud Console, head to the “Firewalls” section. You can either create a new firewall or modify an existing one attached to your server.
In the inbound rules, allow the following TCP ports:
- Port 22 for SSH
- Port 9333 for Litecoin P2P (or 8333 for Bitcoin)
- Port 9332 for Litecoin RPC (or 8332 for Bitcoin) if you plan to access RPC externally
If you don’t allow these ports in the Hetzner panel, incoming connections — including RPC calls — will be blocked regardless of your local settings.
Once the rules are added, attach the firewall to your server instance.
On your Ubuntu 24.04 server, make sure UFW is installed and configured to allow essential traffic:
sudo ufw allow OpenSSH
sudo ufw allow 9333/tcp        # Litecoin P2P (or 8333 for Bitcoin)
sudo ufw allow 9332/tcp        # Litecoin RPC (or 8332 for Bitcoin), if RPC access is needed externally
sudo ufw allow 22/tcp
sudo ufw enable
RPC access should be restricted unless you specifically need it exposed to other machines. If you’re only using RPC locally (on 127.0.0.1), there’s no need to open port 9332 or 8332 externally in either UFW or Hetzner’s firewall.
Make Syncing Faster
Syncing a full node/ pruned node can be a slow process, especially for Bitcoin. Thankfully, Core software includes a few optimizations that preserve full verification while speeding things up. Two key ones are assumevalid and multithreaded block verification.
assumevalid is a performance hint built into Bitcoin Core (and inherited by Litecoin Core) that lets your node temporarily skip signature checks on historical blocks during initial sync — but only if those blocks are buried deep enough under newer, validated proof-of-work.
This doesn’t mean your node is trusting someone else — it still downloads, parses, and verifies the headers and proof-of-work for all blocks. It just delays full script validation until the tip is reached. Once syncing is complete, all blocks are fully validated, preserving full trustlessness.
Unless you explicitly override it, assumevalid is enabled by default in new releases, using a known-good block hardcoded in the source code:
# Optional: override the default value
assumevalid=0000000000000000000abc123...   # block hash
threading enables multithreaded script validation, helping to leverage multi-core CPUs — like the 4 vCPUs in Hetzner’s CAX21 plan. Both Bitcoin Core and Litecoin Core support multithreaded script validation
By default, the node automatically detects the number of logical processors and uses them to parallelize block validation. You can explicitly set this with -par=N, where N is the number of threads to use:
# Optional: override the default value
par=4 # Runs on 4 threads